Introduction
The Flashforge AD5X is a 3D printer that I’ve been excited to get my hands on for a while now. It’s a multicolor CoreXY 3D printer advertised as a machine that just works out of the box, so that anyone will be able to use it with minimal headache. I think they (mostly) were able to deliver on that claim, I’ll talk about that below. I’ve spent the last week with this machine, and while only time can tell how it will hold up in the long term, I want to share my preliminary thoughts.
Background
Flashforge initially shipped a small number of units last year before halting shipments in order to work on improvements suggested by early reviewers, so I was curious to see just what improvements they’ve made. On the current batch of machines they made some slight changes to the nozzle/heatbreak which is supposed to eliminate the heat creep issues early units experienced. They are also using a different auto-retracting spool holder. So far I have only printed PLA and Matte PLA on mine, and haven’t had any issues with heat creep, though I have had some problems with the spool holders. I noticed that when using the spool holders that came with the machine, the filament would occasionally get snagged on the spool and Stop feeding.
For this reason I designed my own spool holder which you can find on my Printables page.
First Impressions and unboxing
The printer is packaged well, tightly packed in the box with nice foam, similar to all the other printers of this style that I’ve unboxed. Setup was straightforward. The listing advertises that you’ll be up and running in 10 minutes or less, I think it took me closer to 20 before I was pushing print on the pre-sliced dual color poker chip print, but by no means did it take long.
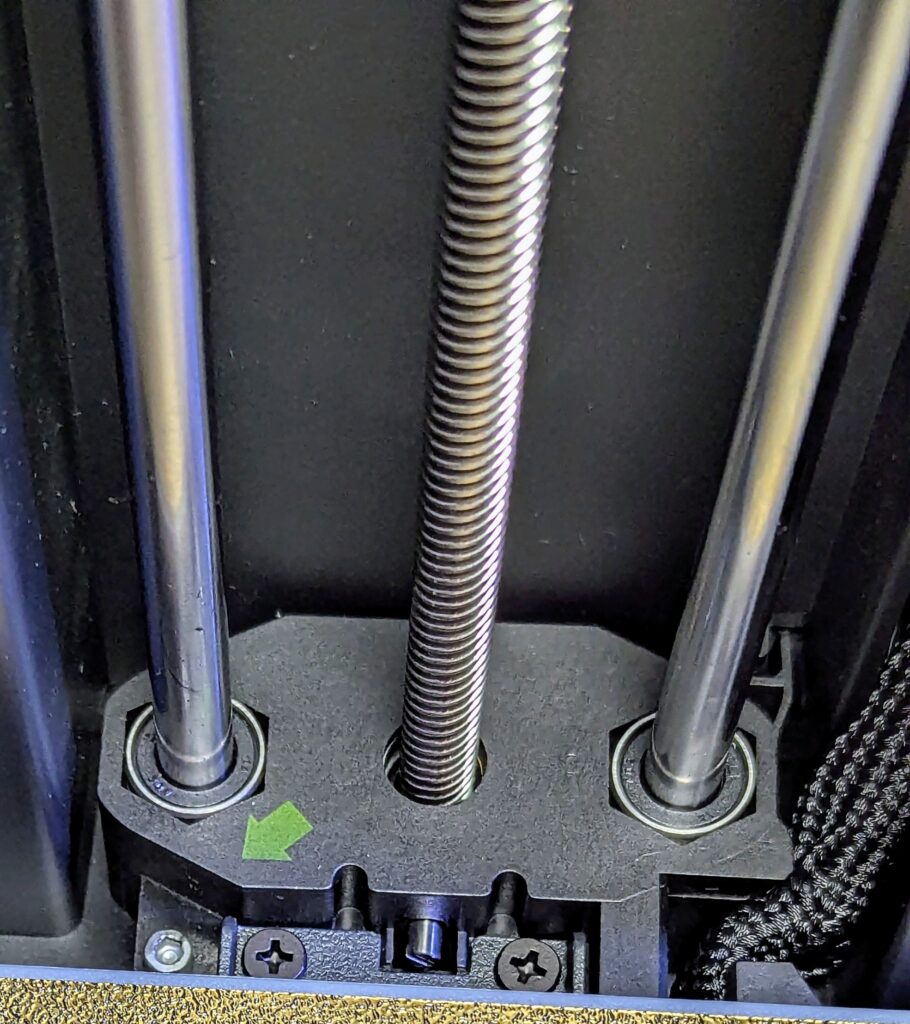
Note on leadscrews: Strangely, the leadscrews seemed to be dry out of the box. This was an easy fix though, I just applied some Superlube and they were good to go. Still, I would expect them to be lubed from the factory.
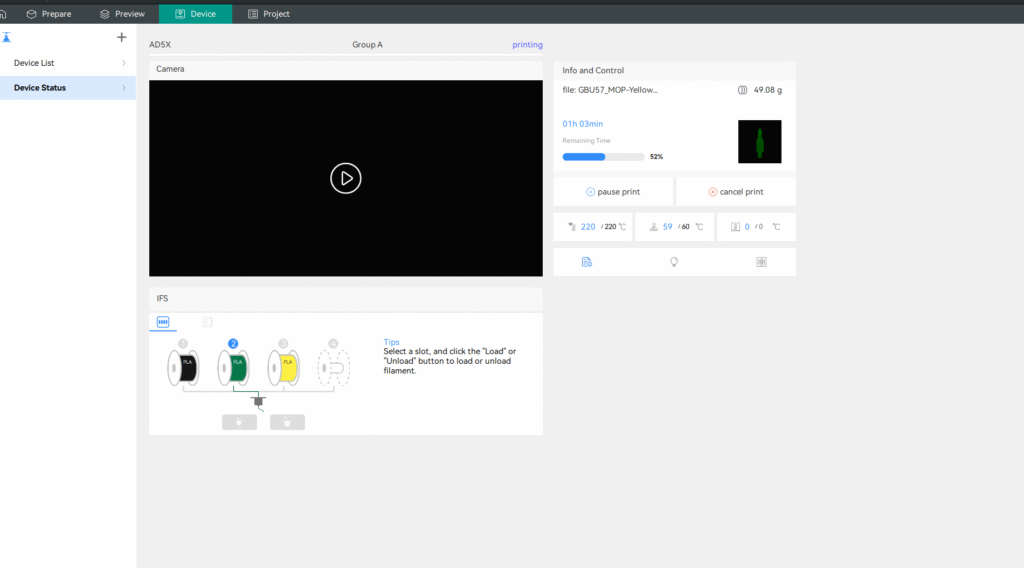
IFS
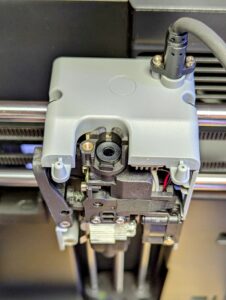
Flashforge has gone a slightly different direction than most other manufacturers when it comes to the filament changing unit. Instead of using an AMS style box that sits on top of the printer, they instead have gone with a small unit that mounts to the side of the printer, which looks like it could have been inspired by the MMX project / Low Rider MMU. Four filaments feed into, and exit from the unit, each lane has its own drive gears which appear to be selected via a mechanism inside the unit. The individual PTFE tubes converge at the 4 in 1 out coupling which plugs into the top of the toolhead.

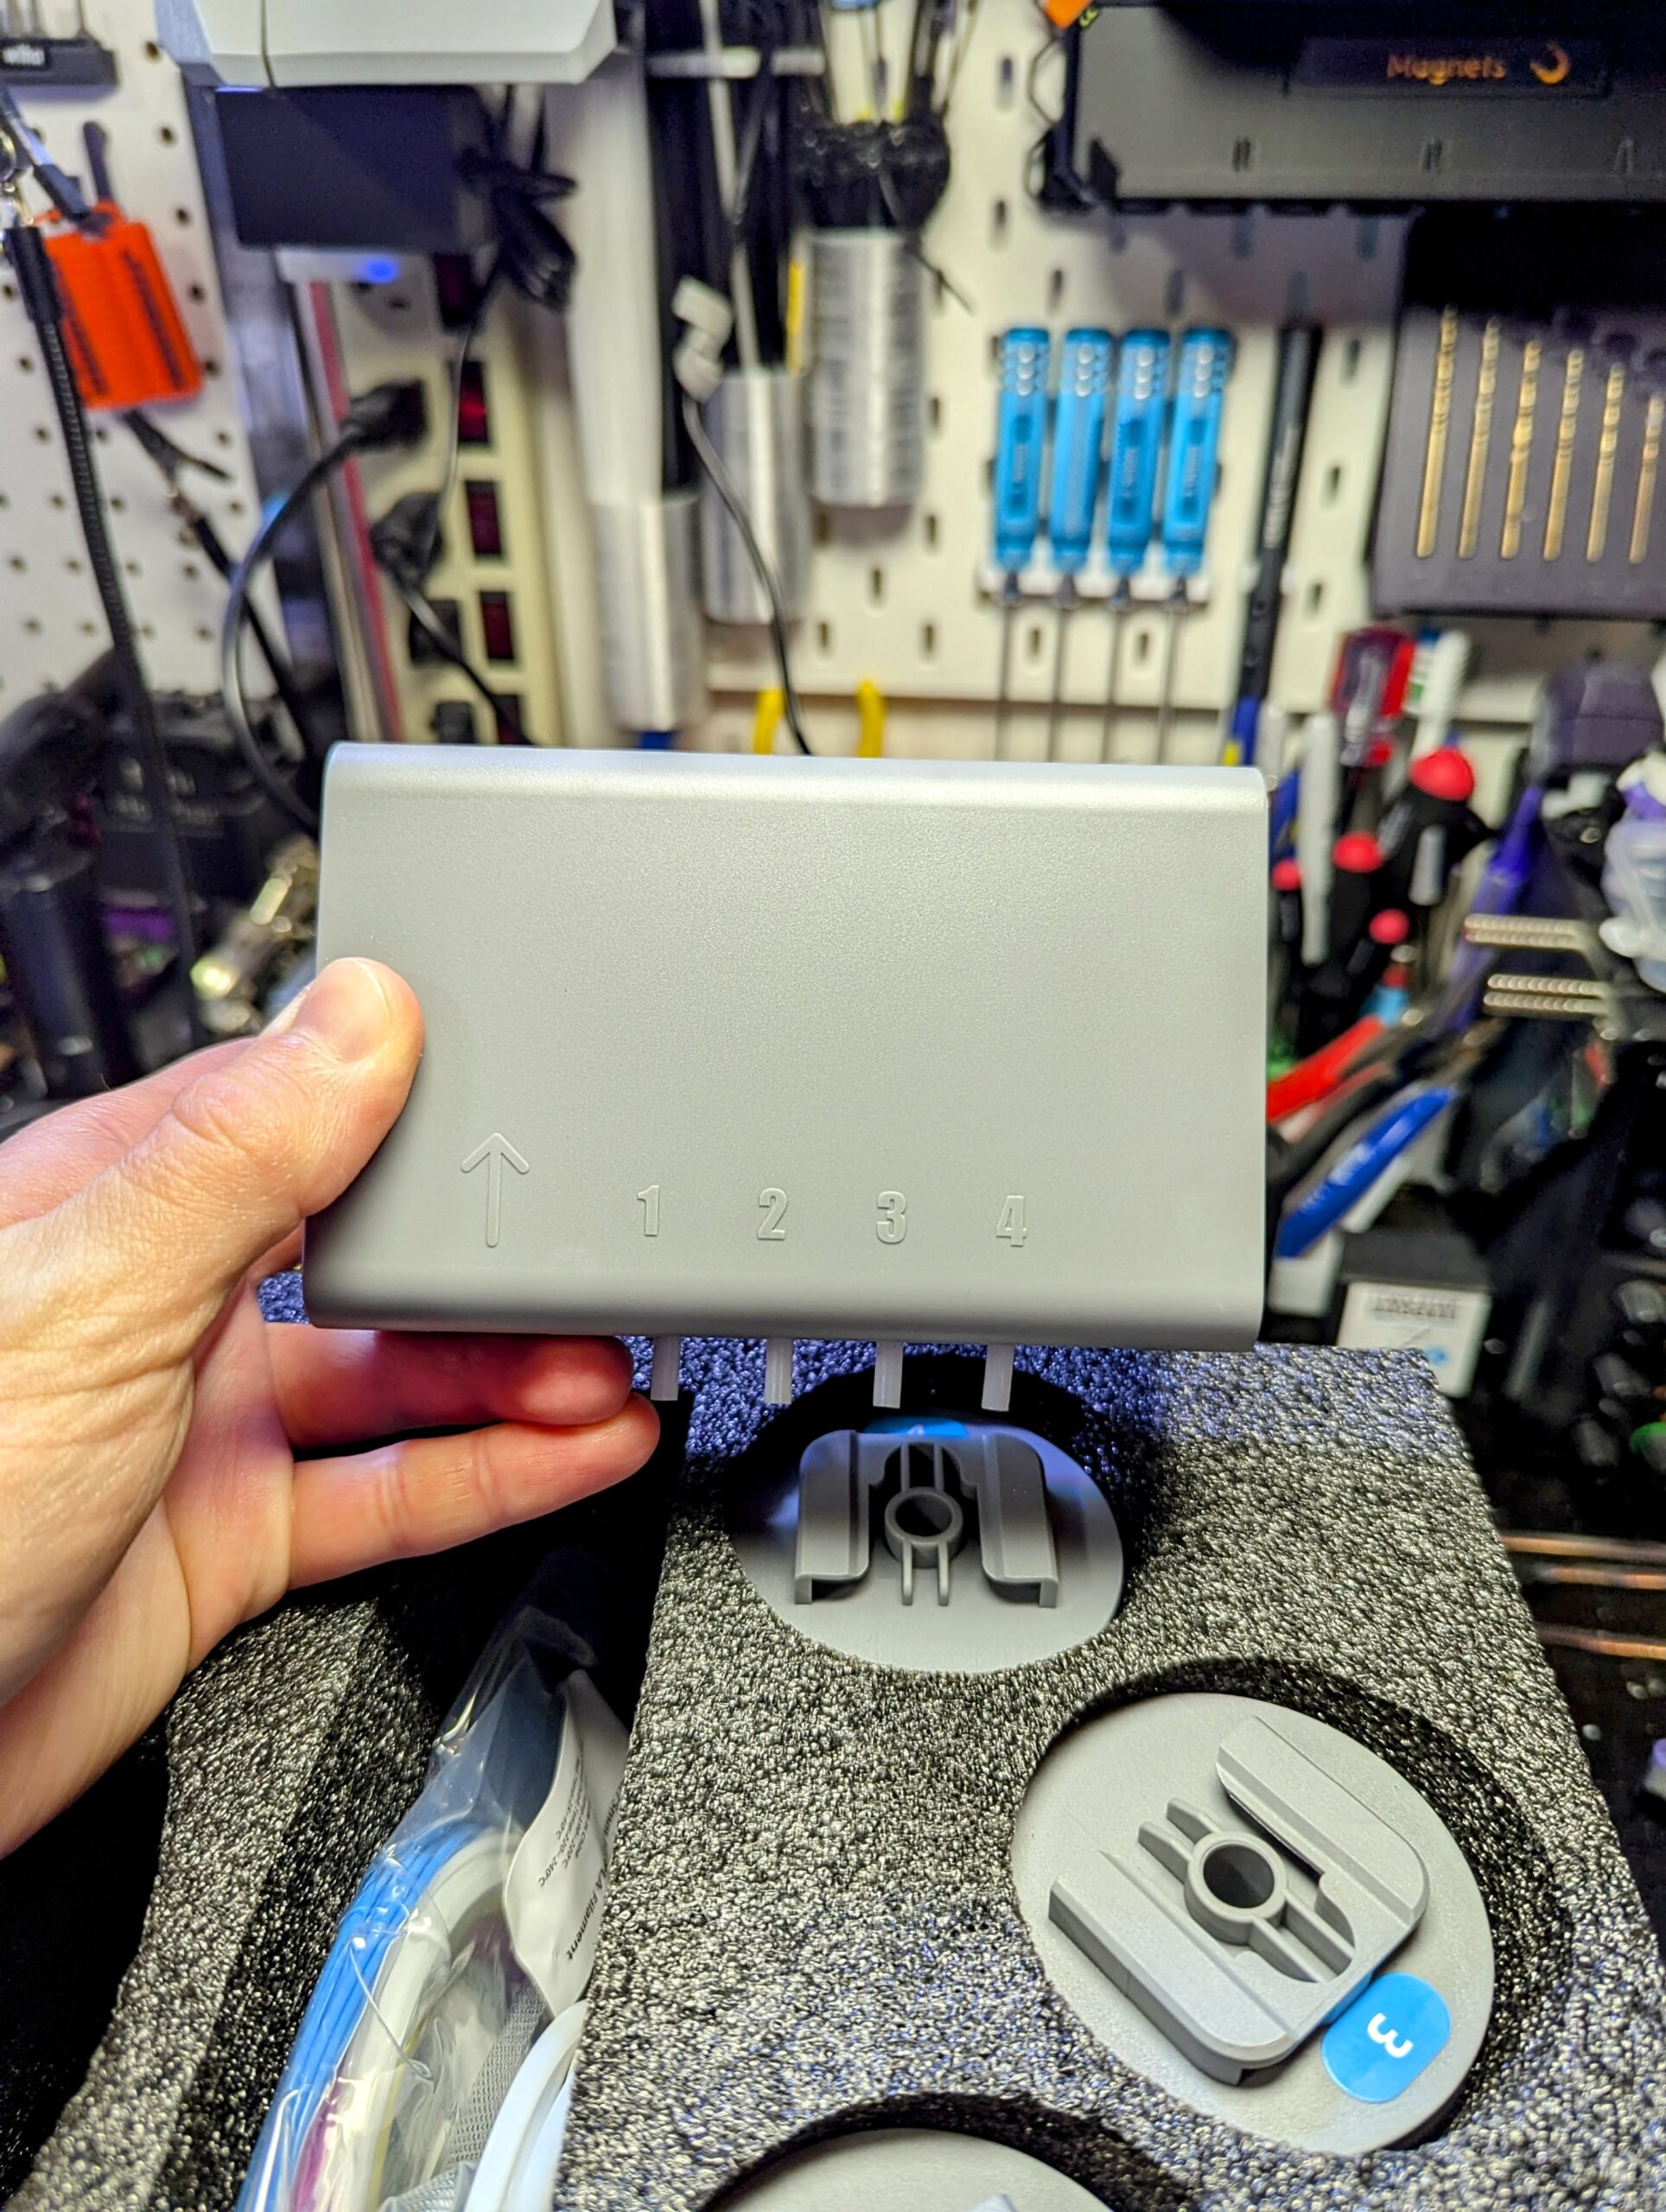
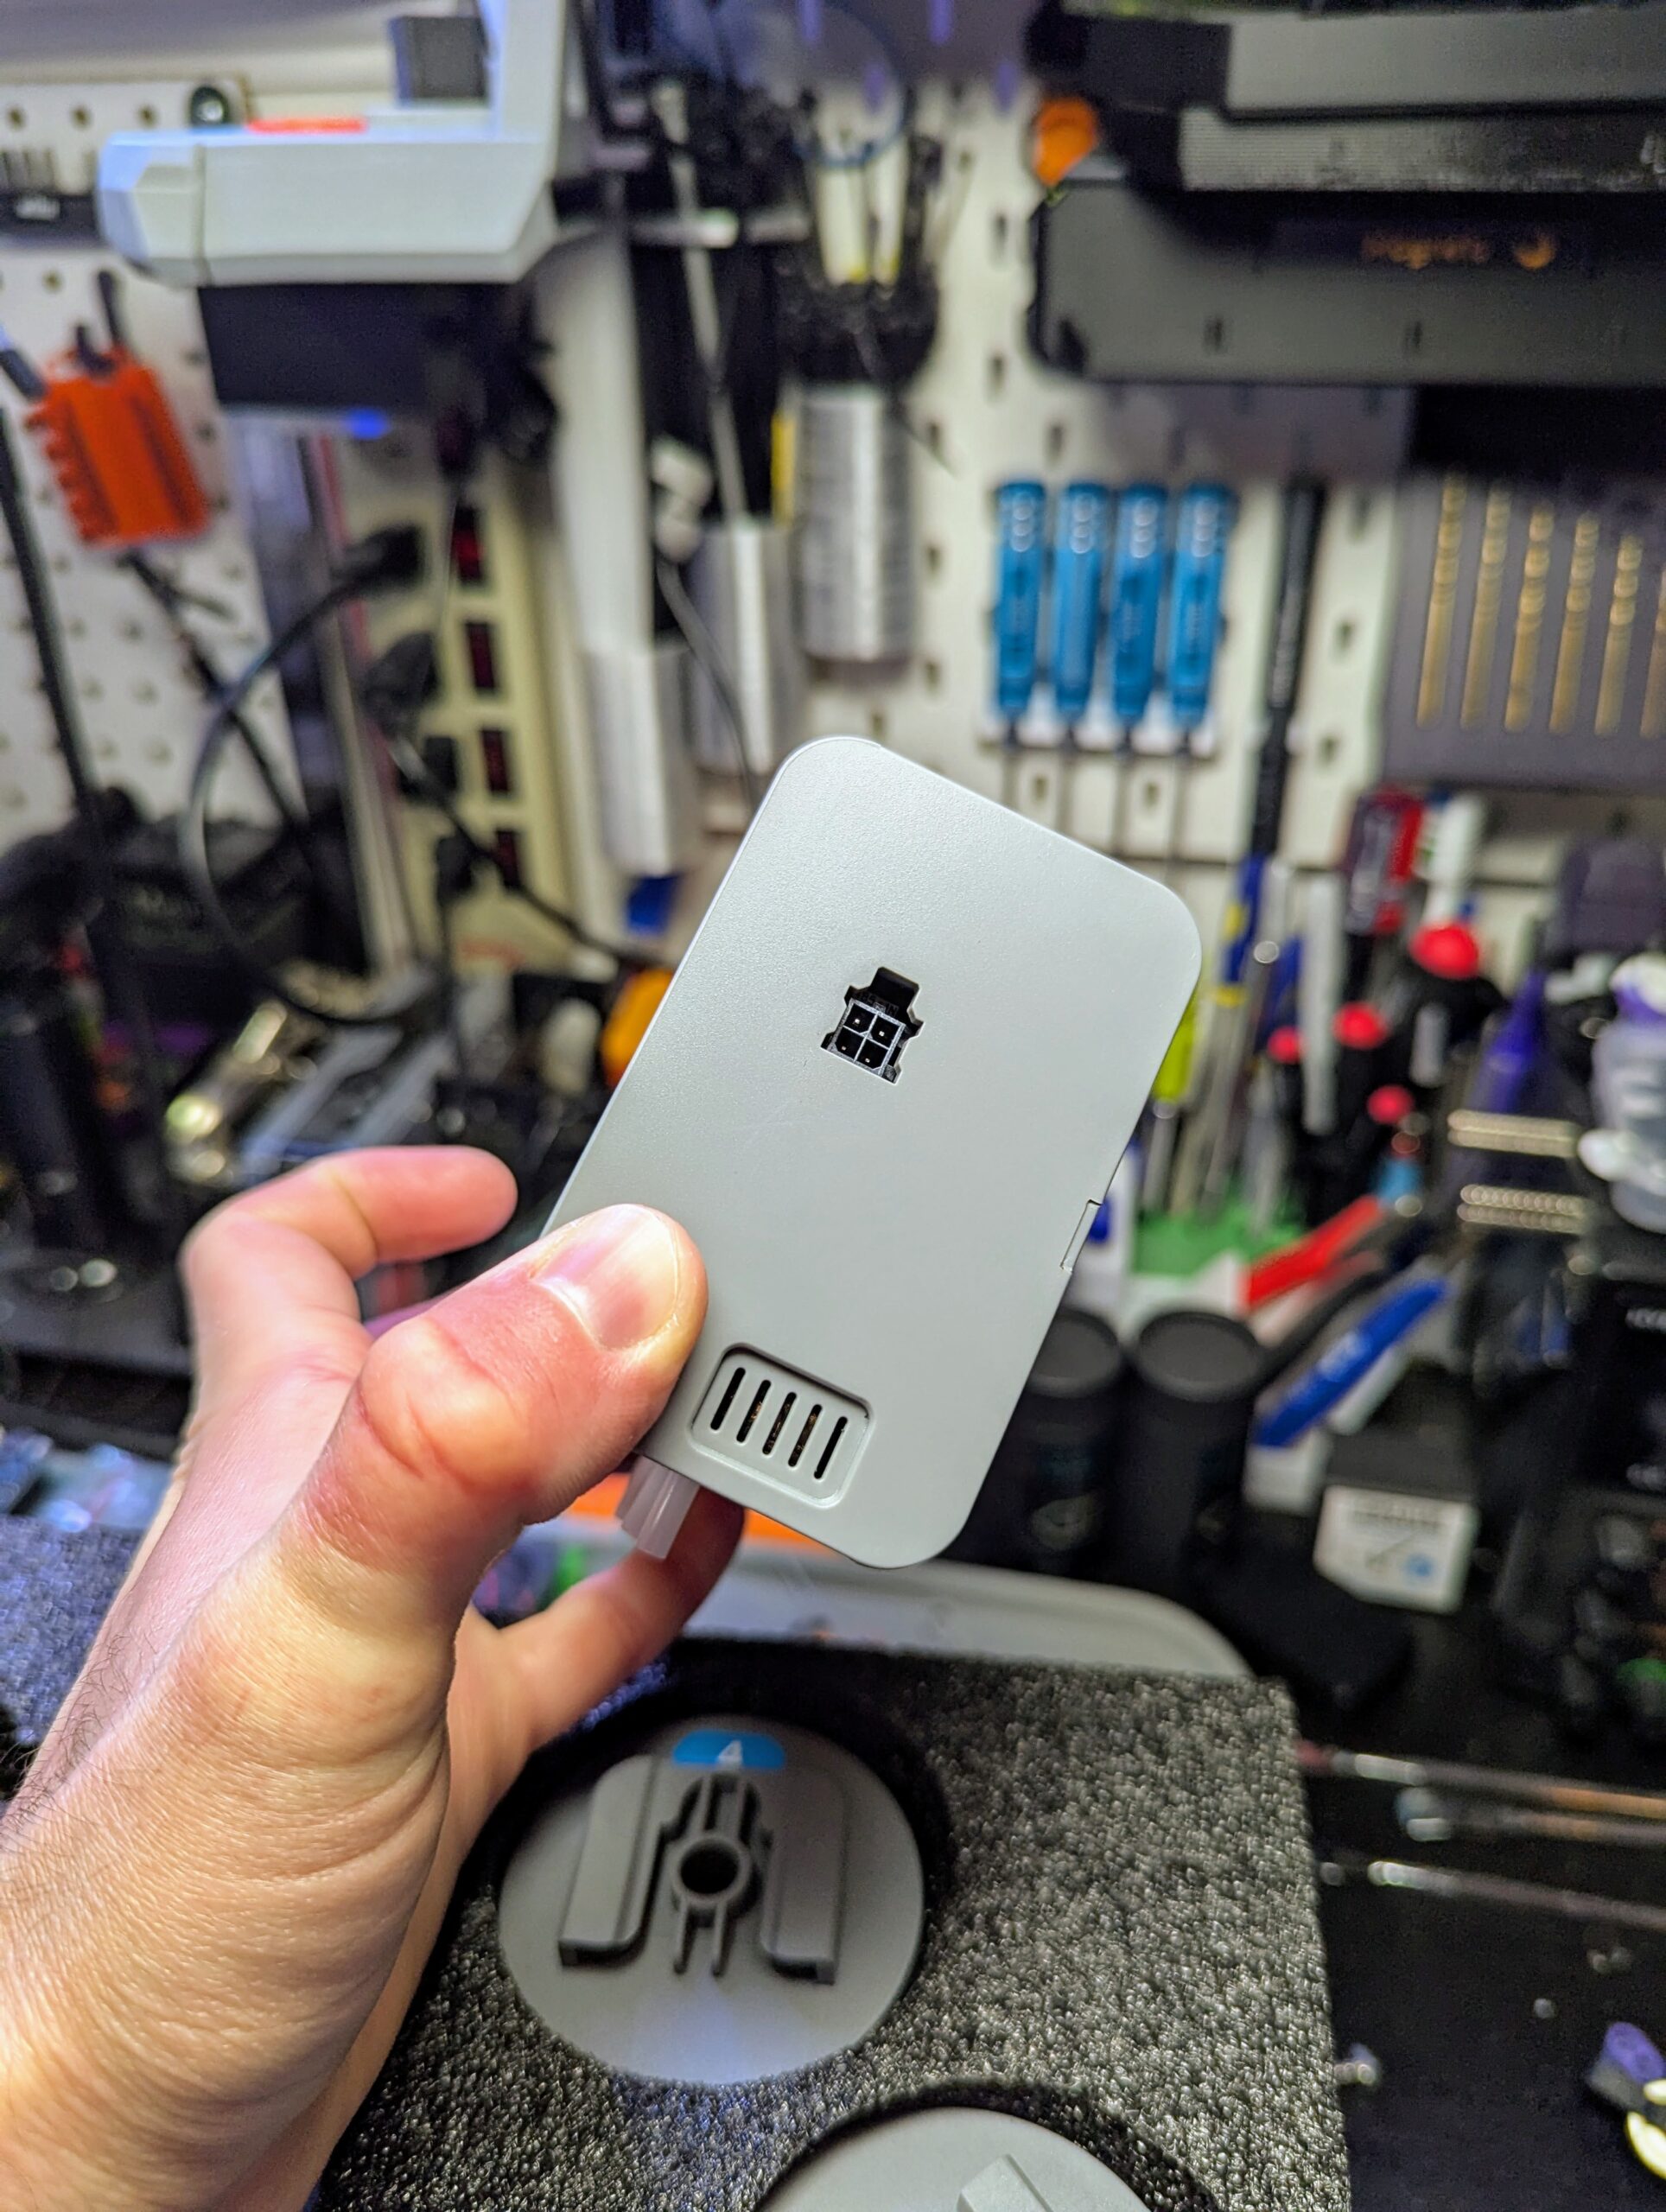
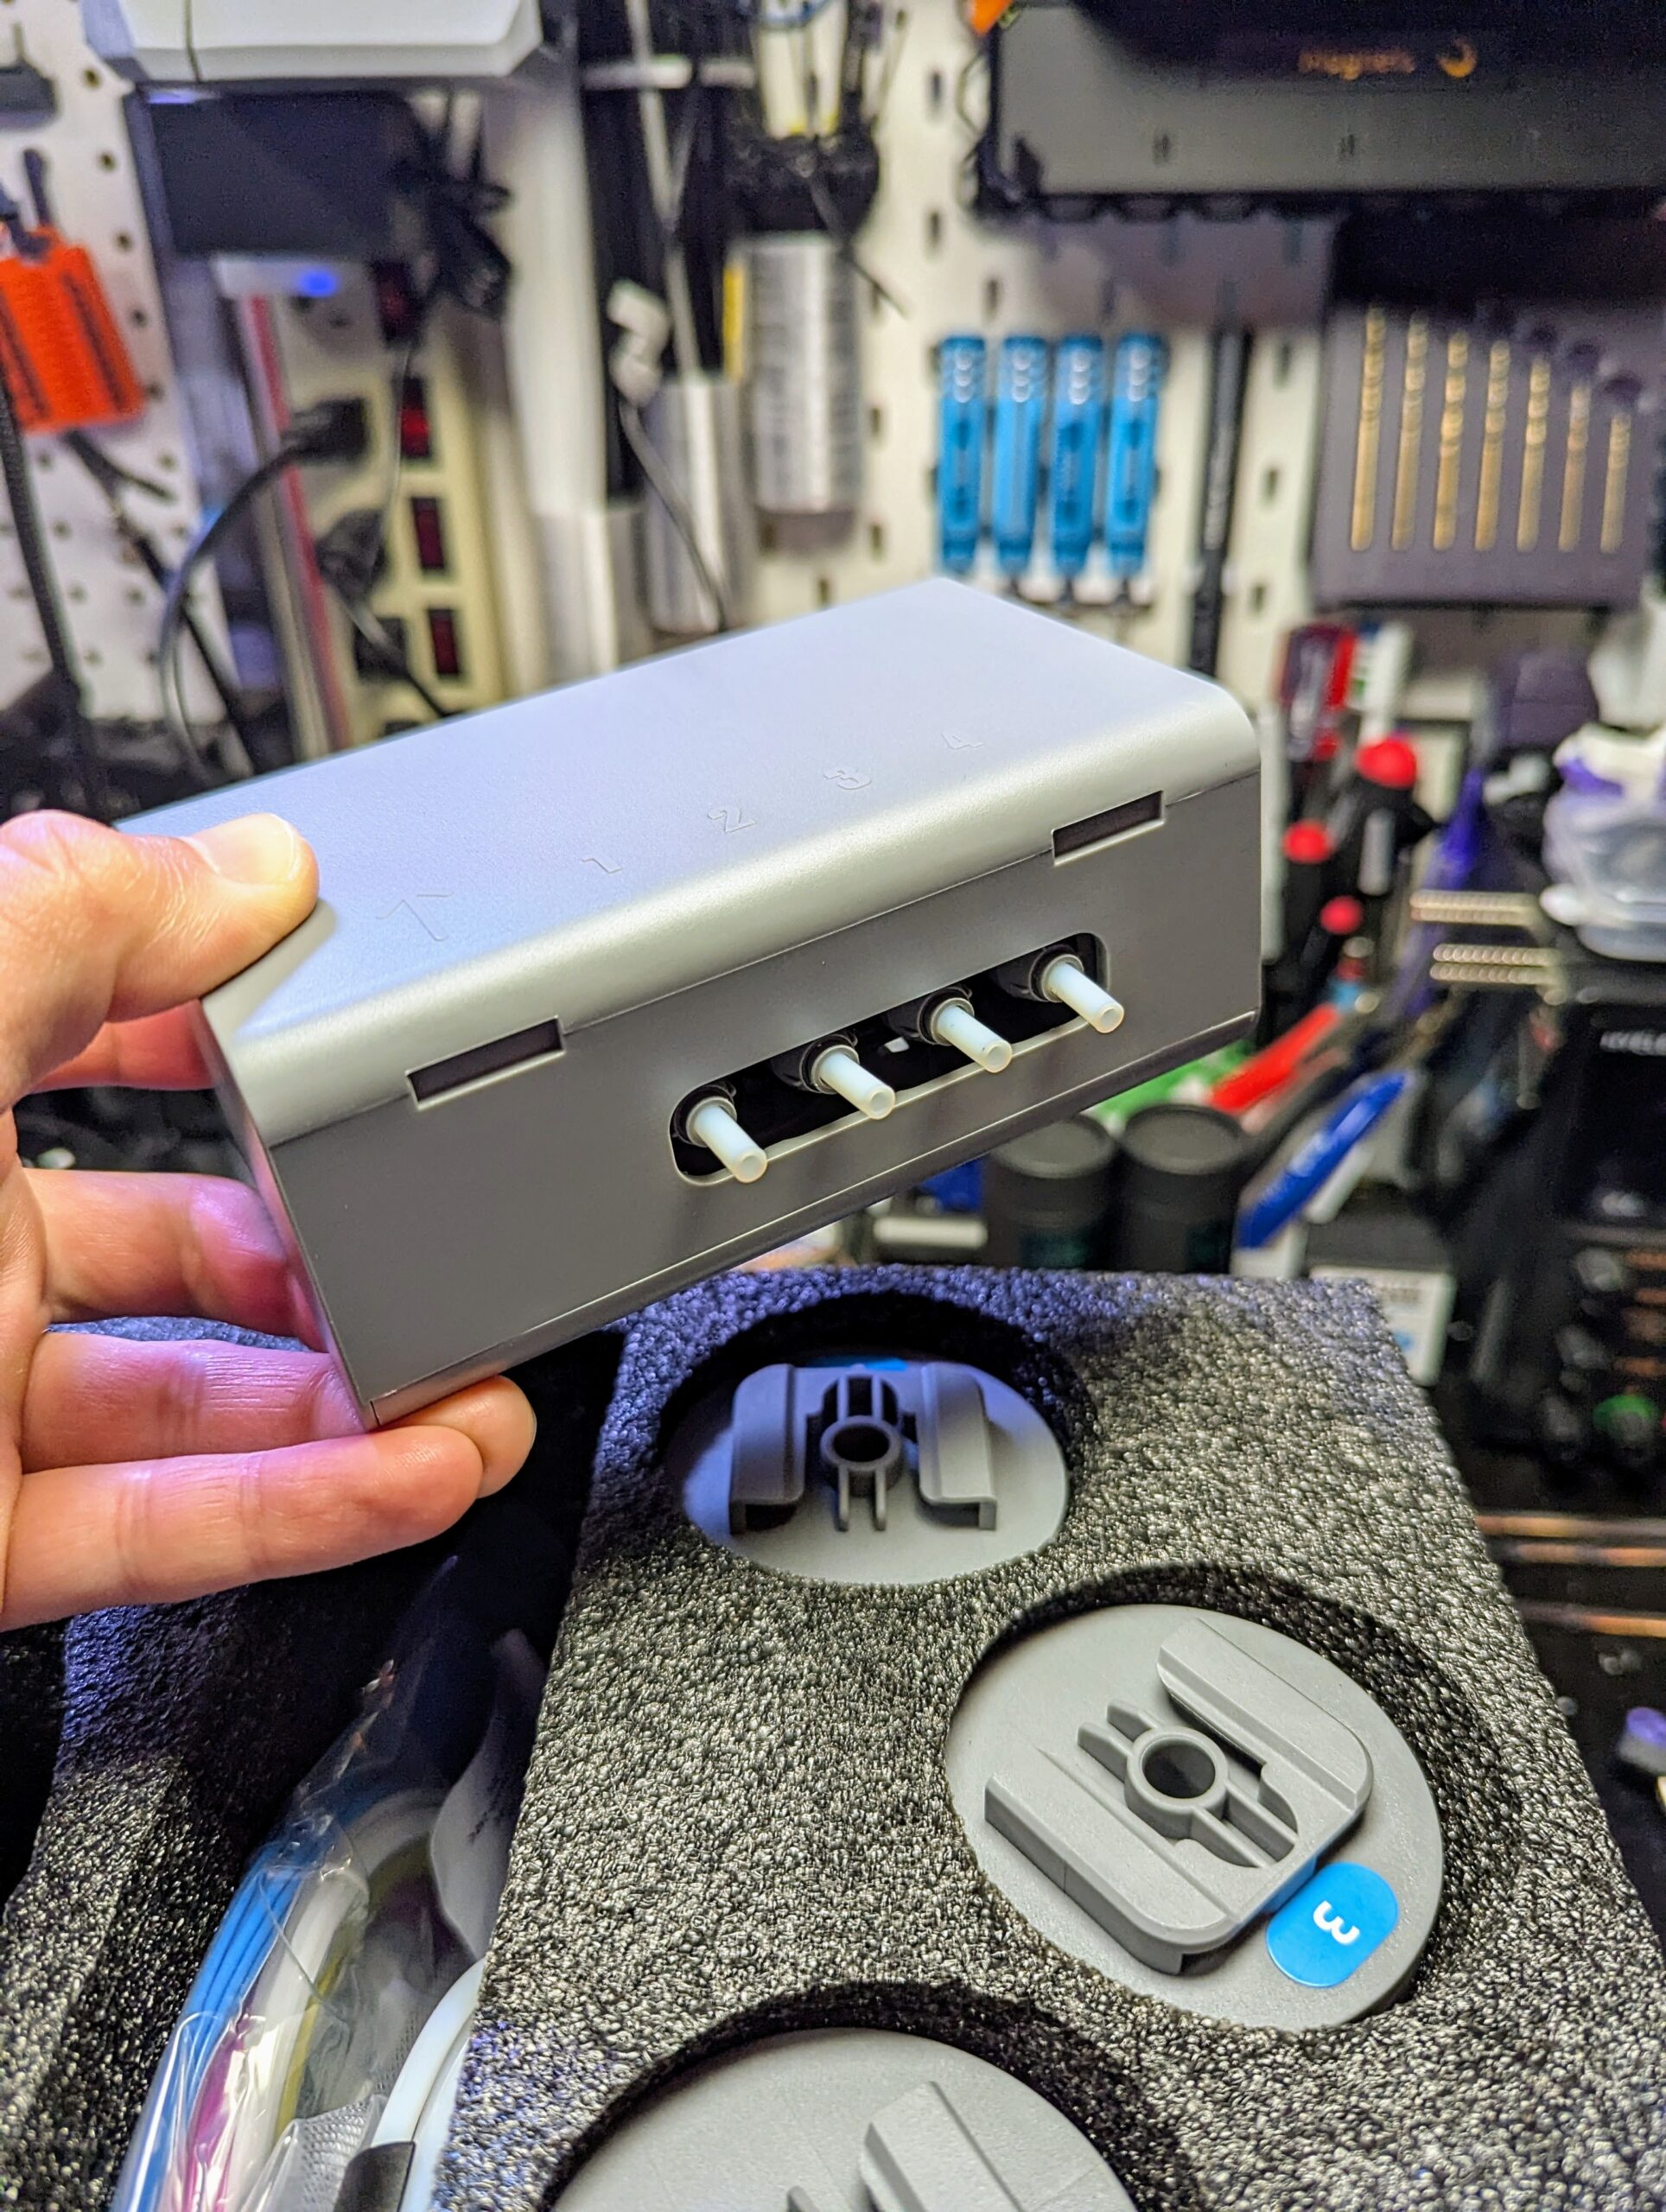
One plus side to this approach over the AMS style systems is that the retraction distance at time of toolchange is much shorter, this in theory should lead to faster filament swaps and faster prints overall. I’m still testing this though, as toolchanges still are by no means fast.
Toolhead:
The toolhead is generally pretty similar to all of the other Bambu-inspired printers coming out these days. One area the AD5X toolhead differs is that instead of the nozzle, heatbreak and heatsink being pressed together so that you have to change the whole nozzle instead of just the nozzle, the nozzle/heatbreak are removable from the heatsink. This is a welcome departure from the aforementioned configuration, as I’ve always found changing the whole hotend to be an unnecessary pain. The AD5X hotend uses a latching system to secure the nozzle-heatbreak assembly in place. This is rather unique and I’m interested to see how it holds up long term, after a bunch of nozzle changes.
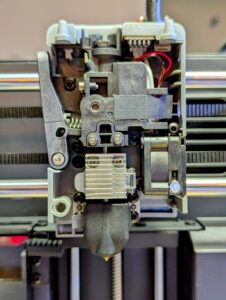
Another nice feature of the toolhead is the use of pogo pins to supply power to the part cooling fan. This way there’s no need to fumble with delicate wires when removing the front cover, nice one FF.
While I wish there was a spare nozzle included with the printer, I was able to find some third party ones on amazon for a decent price HERE.
Build Volume:
The build volume is on the small side compared to most modern printers at 220mm cubed. While this is still big enough more many jobs, it would have been nice to see something closer to 260mm like other printers in this class.
Firmware:
The AD5X, like some other Flashforge printers, runs a locked down version of klipper. This is a swing and a miss in my book. I wish they provided an easy way to unlock the full klipper so that we could have access to the mainsail or fluidd frontend. This would not only give us more control over our machines, but would overcome the remote connection issues I talked about above, as we could just connect vanilla Orcaslicer to the standard klipper webserver to upload print jobs and control the machine.
I was able to find one open source project on github called zmod which allows you to unlock the (mostly) full klipper firmware. It seems like it may be a good option, although I may wait until the warrenty period is up on my machine before I try it.
Slicer / Remote connection woes:
While I do really like this printer in general, one area that I really hope Flashforge will continue to work on and improve is the slicer / remote connection situation. Currently you have two options, well, only one option, if you want to be able to use remote connection and upload directly from the slicer. In order to access these feature you are forced to use Flashforges fork of Orcaslicer. I’m fully against this practice, In my opinion if a manufacturer is going to use a fork of a slicer, they should just roll their features into the master branch, there’s a few reasons for this. Reason one is fragmentation, I immediatly noticed that the current version of Orca-Flashforge (Flashforges Orca fork) appears to be a few version out of date compared to the current stable release of vanilla Orcaslicer. This is a huge deal with this slicer in particular, because with every release the project gains substantial new features, features that you simply won’t have access to on Flashforges outdated build of Orcaslicer. Another thing I found strange, is that Flashforge seems to have removed the dark mode toggle altogether from their fork of Orca. I live in dark mode, so this was slightly more than no big deal to me.
Another thing I didn’t like was that you are required to create an account and bind your printer to it in order to connect to the printer via Orca-Flashforge. After going through this process I was able to put the printer into LAN mode, but I much prefer the way Elegoo has done things on the Centuari Carbon, where there’s no need at all to sign in, or even to create an account at all. After getting it set up, I id observe a strange behavior where the slicer showed my printer as unavailable until I clicked the “add new printer” button, at which point it would show as available again. This happened every time I closed and opened the slicer. On the plus side, LAN mode, and the printer connection in general works considerably better than my Bambu P1S ever did, so that’s something. I just wish Flashforge would allow me to connect to the printer through Orcaslicer.
This led me to go back to my standard slicer, which is vanilla Orcaslicer. There I found a profile for the AD5X, but sadly I found that I was unable to remotely connect to the printer. I’ve resorted to saving my .gcode onto a flash drive and plugging it into the printer very time I need to start a print job, I didn’t even have to do that back in 2017 with my OG Ender 3’s. Cmon Flashforge, can we please fix this?
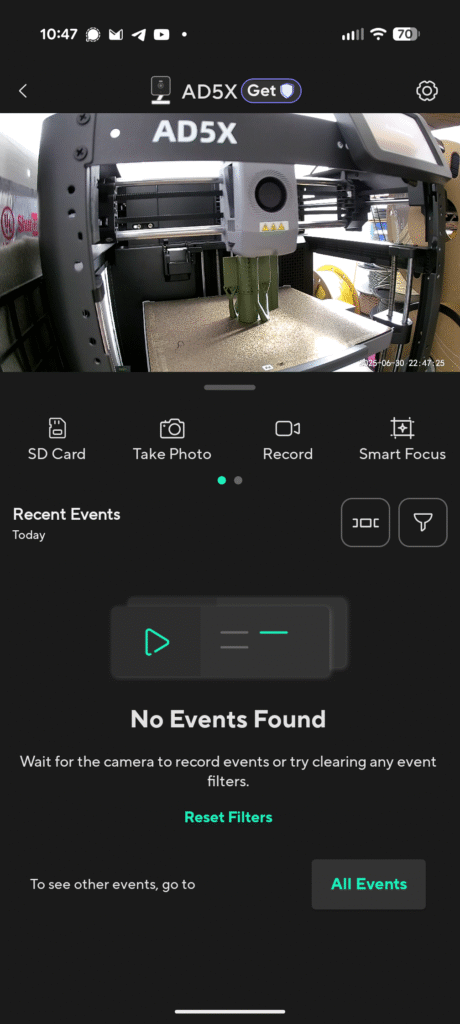
Another thing I wish this printer included was a camera to monitor prints. Even a simple low quality webcam would be better than nothing. I ended up mounting a spare wyze cam in front of the printer so I can check in on prints.
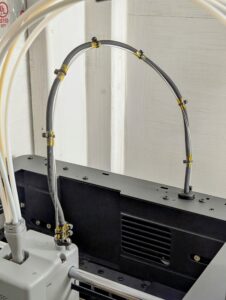
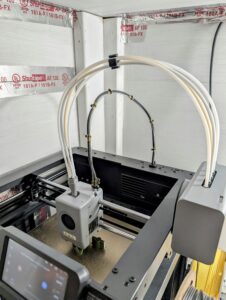
Umbilical issue and simple fix:
Another issue I ran into was that the umbilical would get yanked in a way that didn’t look good whenever the toolhead would move to the front-left of the bed when using the clip that came with the printer.
I came up with a simple fix for this using a piece of stiff, heat resistant filament (PC), some Kapton tape, and a few small zip-ties. If I had some piano wire I would’ve used that, but if you have a spool of just about any engineering filament (other than nylon, because it creeps over time) laying around a piece of that should work to make a support for the umbilical.
Conclusion:
Overall, while there are some small improvements that would go a long way to improving this printer, I think the AD5X is a good machine for the price ($399 at time of writing). Initial setup was easy enough that I would feel comfortable letting someone who is new to 3D Printing go through the process. I genuinely hope Flashforge continues working to improve the machine as well as the software because I there’s big potential here. Time will tell how it holds up in the long run, so be sure to check back here and follow us on all the socials to stay updated.
As an amazon affiliate I may earn a small commission if you purchase something after clicking one of the links on this page. This doesn’t cost you anything extra, but does help support me. Thanks.